As a developer, there are many times you want to build and test features in your applications. You are either faced with a short trial period or forced to pay. This is not the case with the the Microsoft Office 365 Developer Program. The program gives you an E5 subscription that allows you to use and develop on top of Office 365 for 12 free months with access to various apps and services.
Prerequisites
To register for the developer account you need a Microsoft account either personal, school or organization. (Outlook, Hotmail or Live). If you don’t have any of these you can create a free personal account here.
The Process
To get started visit developer sign up page here where you would be taken to the landing page to start the application process. Click on the “JOIN NOW” button and follow the instructions show in the images below;
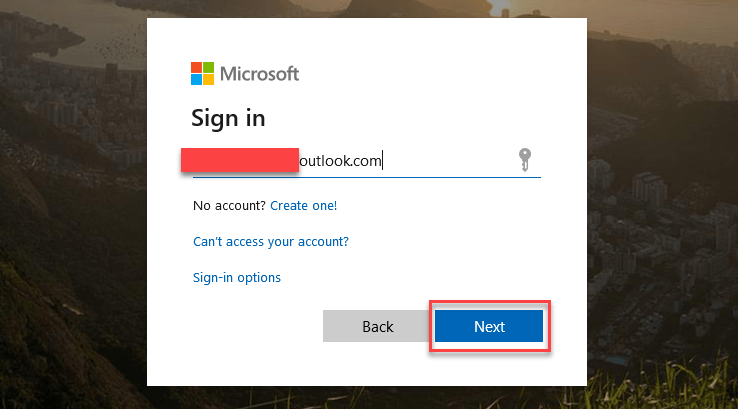
If you have been using your Microsoft Account often, it should be in the list of available accounts for you to click on, else click on “Use another account”, type in your Microsoft Account and click “Next”
If you have previously logged in with this account, you would be taken to the application page without having to provide your password. if not enter your password on the next screen and click “Sign in”
I noticed that for some reason after providing my password I was asked to Sign in again because I was going to access sensitive information. When promoted enter your email address again and click “Next” .
You would be prompted for your password and a new message explaining why you had to sign in again.
Provide your password and click on the “Sign in” button
Your first name, last name and email would be pre-filled at the top. Provide you country and company name, then make sure to check the box to accept the agreement and optionally opt in to receive information from the Office 365 team. then Click “Next” button.
Select the industry you work in at the top and then check all the boxes that applies to you. You are not required to check all of them though. then click “JOIN” when you are done.
You are In, time to set up your subscription.
Welcome to the elite group of Office 365 developers. at this point you would be presented with the option to set up subscriptions and if you want to, create dummy uses, events and emails.
It is possible that by the time you try this the UI might have changed but look out for “SET UP SUBSCRIPTION” and click that to proceed. as of the time I am writing this, this is how it looks.
As you would notice the program gives you access to all the latest Office 365 apps, Enterprise Mobility + Security, Azure AD, access Power BI, Power Apps, Power Automate, Power Virtual Agents and many more.
Click on the “SET UP SUBSCRIPTION “ and proceed to the next stage.
Your country would be pre-filled but you would be required to Create a username, a unique domain name, and password. These would be used to create you subscription admin account that you will use to manager the free 25 licenses you will be given for the 12 months. if all the information you provide is validated the “Continue” button would be active for you to click.
Provide a phone number for validation and click “Send Code” for a code to be sent to the number. I had to try a few times hence my button showing “Resend Code”.
When you receive the code, enter the code in the provided text box and click “Set up”. Wait while the subscription is set up.
At this point you Admin account for the subscription is done. Pay particular attention to the “days left” and “Expiry date” . Though you have this account for 12 months it is renewable every 91 days as a way to ensure you are utilizing the subscription. I will advice you use this subscription actively to avoid it been suspended or dropped to an E3 Account.
It is also recommend that you leave this as the Administrator account and create a new account for your personal use and assign yourself a license. We will see it in the next steps.
This Admin account is what you will be using to either install the sample data packs for dummy users, emails and Events (I will show in another post) or to manually add your own users and assign them roles and license.
Click on the “Go to subscription” lets set up a dummy user and assign them a role and license. you would be asked to provide your password on the next screen.
After clicking sign in, you will be taken to your Office 365 dashboard. you will see some of the apps you have access to as an Admin.
Click the “All Apps” icon to show all the apps you can use.
Click the “Admin” icon when you ready to create your first user.
You will be provided with a login screen to either pick your login account which would have been listed for you automatically or click “Use another account” to manually enter your account details.
You will be taken to your “Microsoft 365 Admin Center” Dashboard were you can use the setup wizard to customize your domain name if you have a custom domain you have already purchased or just use the navigation and options on the page to create your dummy user.
Click on the “Add user” button in the User management card.
In the basic step, fill in the first name, last name, display name will auto fill based on the names you provided but you can change it if you desire then enter the username.
You can choose to type or create your own password but for security best practices, it is recommended you select “Auto-generate password” and check the box to require the user to change their password upon first sign in.
Click “Next” to move on to assigning Product licenses.
Ensure the pre-selected country is correct, select the option to “Assign user a product license“. Check the “Microsoft 365 E5 Developer (Without Windows and Audio Conferencing) option
Optionally you can expand the Apps section to see all the pre-selected services the license provides.
Click “Next” when you ready to continue.
By Default, every user you add is a non-admin user. to change their role click on the arrow pointing down next to the “Role (User: no administration access) ” option and change it to “Admin center access”.
You can also determine what services the user has admin rights to in the drop down.
You can also expand the profile info section and fill out more info about the user you are adding.
Click “Next” to move to the final stage.
on the finish page, confirm that all the information provided is accurate and then click “Finish adding”
A summary page will show with the details of the user and the temporary password with options to save the user settings as a template and also to create a new user.
Make note of the details and click “Close“
Conclusion
All set, you have successfully signed up for the Microsoft 365 developer program and created your first dummy user you can develop with.
Repeat the user account creation process to add up to 25 users or use the sample pack tool to install more dummy users, email and events.
You can use this account for all Office 365 Development and also developing apps on the Power Platform. Though Power Virtual Agent (PVA) was not in the list of apps on your dashboard, simply go to the PVA Page and sign with any of the user account you created using the steps above.
To login as a user go to the office portal here provide your username and password when requested and use any of the apps available to you.
I hope you have enjoyed reading this post and find it useful. If you have any comments or feedback, please provide it in the comments section below.
This website uses cookies to improve your experience. We'll assume you're ok with this, but you can opt-out if you wish. Cookie settingsACCEPT
Privacy & Cookies Policy
Privacy Overview
This website uses cookies to improve your experience while you navigate through the website. Out of these cookies, the cookies that are categorized as necessary are stored on your browser as they are essential for the working of basic functionalities of the website. We also use third-party cookies that help us analyze and understand how you use this website. These cookies will be stored in your browser only with your consent. You also have the option to opt-out of these cookies. But opting out of some of these cookies may have an effect on your browsing experience.
Necessary cookies are absolutely essential for the website to function properly. This category only includes cookies that ensures basic functionalities and security features of the website. These cookies do not store any personal information.
Any cookies that may not be particularly necessary for the website to function and is used specifically to collect user personal data via analytics, ads, other embedded contents are termed as non-necessary cookies. It is mandatory to procure user consent prior to running these cookies on your website.